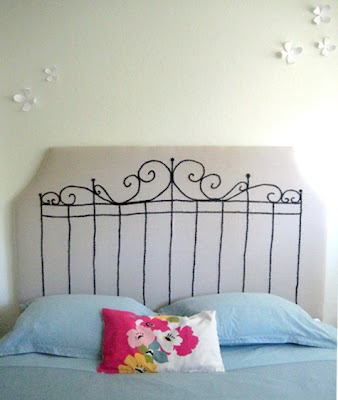
I just saw this post on Design*Sponge and wanted to share it. As soon as I have a real place of my own I'd love to try this. I even like how the lines of the 'wrought-iron' are a bit squiggly.

Embroidered Headboard DIY
Materials:
– Upholstered headboard kit, like this one from Horchow or build your own.
– Sturdy cotton fabric. If you pick a weave without a lot of “give,” it will help prevent stretching. If you use a linen or thin cotton, it’s easy to reinforce it with iron-on interfacing, which you can get at any fabric store.
–Butcher paper
–Tape measure
–Tracing wheel and tracing paper
–Yarn darning needle
– Wool yarn
–Large embroidery hoop
–Staple gun and staples
Directions:
1. Follow kit instructions to create a padded headboard.
2. Tape together butcher paper to duplicate the shape of the headboard.
3. Draw your design on the paper. A tape measure is helpful for getting the general proportions right. Don’t worry too much about getting the design absolutely precise, since the charm of handiwork lies in the slight imperfections.
4. Pin your fabric to the headboard. Mark center and corners so that you have the fabric aligned correctly when you put it back on after stitching the design.
5. Pin pattern to headboard, and transfer design using tracing wheel and tracing paper.
6. Stitch your design, using a yarn darning needle and wool. Use an embroidery hoop to keep fabric taut. The chain stitch is a fun, fast way to create curvy lines and can also be used to fill out solid blocks: click here
7. Wash fabric, then iron. Reinforce with interfacing if necessary.
8. Stretch fabric over headboard and staple gun to the frame, starting from top center, then bottom center, then the sides.
9. Attach headboard to bed frame.


1 comment:
you really have sewing and home-making on your mind these days. must be the thought of getting closer to your sewing machine!
Post a Comment